Three-Point Lighting, Explained
Key, fill and back light — what each one does, where to put it, and why you should get one light right before you buy the other two.
Three-point lighting is one main light that creates the shadows, one dimmer light that softens them, and one light behind the subject that stops them blending into the wall. That is the whole idea. It is worth learning because it gives you a vocabulary for what you are looking at — once you can name what each light is doing, you can diagnose a shot that looks wrong instead of randomly moving lamps. It is also worth deflating slightly: the diagram sells three lights to people who would get more from one good one, and the first thing a lighting professional does on a small shoot is leave lights in the van.
The key light: the one that matters
The key is your main light, and it is responsible for almost everything you notice about how a face looks. Put it in front of the subject, roughly 45 degrees around to one side, and a little above eye level, angled down. That is the standard position because it is what sunlight does, and faces look natural lit from slightly above.
Two mistakes dominate. Lighting from directly beside the camera at eye height flattens a face — no shadow means no shape, and a shapeless face reads as amateur even to people who cannot say why. Lighting from below produces the campfire-ghost-story look, which your brain reads as wrong immediately. If you only remember one thing from this page: in front, to one side, above.
How soft the key is depends on the size of the source relative to the subject, not on brightness. A bare LED is a small, hard source that draws sharp-edged shadows. The same LED behind a two-foot softbox, close in, is a large soft source that wraps around a face and lets the shadows fall off gently. This is why the modifier matters as much as the lamp, and why moving a light closer makes it softer as well as brighter.
The fill light: controlling the shadow
The fill goes on the opposite side of the camera from the key, closer to the camera axis, and it should be dimmer than the key. Its only job is to put some light into the shadows the key created, so you can see detail in the dark side of the face.
The ratio between key and fill is the single most expressive control you have. Nearly equal brightness gives you the flat, bright, friendly look of a commercial or a corporate interview. A fill at a fraction of the key leaves a deep shadow down one side — moodier, more cinematic, more dramatic. Neither is correct; they are different intentions, and you choose by looking at the monitor.
You very often do not need a second lamp for this. A white sheet of foam board placed just out of frame on the shadow side bounces the key back into the face and makes a perfectly good fill for the cost of a coffee. A window on the opposite side does the same thing. The reason to buy an actual fill light is control: a lamp you can dial lets you set the ratio precisely and repeat it tomorrow, where a bounce card gives you whatever it gives you.
The back light: separation
The back light goes behind the subject, above them, pointed at the back of their head and shoulders, and carefully kept out of frame. It does not light the face at all. What it does is draw a bright rim along the edge of the subject, which lifts them off the background and makes the image feel like it has depth rather than being a person pasted on a wall.
It is also called a hair light or a rim light, and it is the cheapest route to the look people describe as “professional” without being able to identify why. A small light is plenty, because you are only catching an edge. An RGB panel is a popular choice here because you can tint the rim or throw a coloured wash on the wall at the same time — the blue-or-purple creator look is this light, not the key.
A related but different light is the background light, aimed at the wall rather than the subject, to lift a dark backdrop or create a pool of light behind them. People often conflate the two. If your wall is already a reasonable tone, a rim light is the better use of a third lamp; if your background is a black void, light the background first.
What to look for when you buy
Four specs decide whether a light will serve you. Mount: a Bowens fitting is the industry standard, so a light that has one can use any softbox, umbrella or dome you buy later. Colour accuracy: the CRI figure, where 95+ means skin tones need less correcting. Colour temperature control: a bi-colour light can be matched to the room rather than fighting it, which matters most if you shoot in daylight and in the evening. And dimming— a light that cannot be dimmed is adjusted by moving it, and moving it changes how soft it is too.
Output is the spec to worry about least. For a face a few feet away in a small room, 60 to 100 watts of LED behind a softbox is more than enough, and people far more often buy too much light than too little. What you want is a light you can control, on a mount that outlives it.
How this is funded:we earn a commission if you buy through our links, at no extra cost to you. It never changes which product we recommend, and we’ll tell you plainly when to skip one. Full disclosure.
Quick picks
Ranked on published specs and buyer fit. Select a row to jump to the full write-up. We have not tested these products — here is exactly what we do instead.
| # | Product | Best for | Price |
|---|---|---|---|
| 1 | 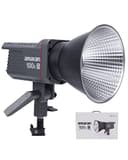 Aputure Amaran 100x S The step into a light that will still be in your kit years later. Aputure's Amaran line brings serious build quality, app control and reliable color accuracy, and the Bowens mount plus a bright 100W output make it a proper key light. One caveat before you buy: amaran has moved this line on to its Halo series, and the 100x S no longer appears in amaran's own COB lineup, so this is now the outgoing model rather than the one amaran sells today. | Best key light | $199.00 · View on Amazon Price as of October 5, 2026. #ad How we’re funded |
| 2 | 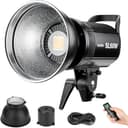 Godox SL60W LED The COB light that gets serious creators off ring lights. A 60W daylight-balanced bulb on a Bowens mount means you can bolt on a real softbox and shape proper, cinematic light. Add a stand and modifier and you have a starter studio key light that punches far above its price. Know what you are buying, though: Godox now sells the SL60II generation (SL60IID daylight, SL60IIBi bi-color) and the original SL-60W's page has gone from Godox's own site, so this is the outgoing version. | Best value key light | $109.00 · View on Amazon Price as of October 5, 2026. #ad How we’re funded |
| 3 | 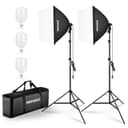 Neewer 700W Softbox Lighting Kit The cheapest way to get two soft light sources on stands. A pair of 24-inch softboxes with daylight LED bulbs covers a two-point interview or product setup for very little. The bulbs and stands are basic, but the soft, even light they produce is the real thing. | Best two-light start | $139.07 · View on Amazon Price as of October 5, 2026. #ad How we’re funded |
| 4 | 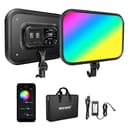 Neewer 18-inch RGB LED Panel The fun light. A full-color RGB panel lets you throw a colored wash behind you — the blue-or-purple gamer/creator look — as well as clean white key light, with a high CRI so faces still look right. One panel behind you plus a key light in front is the classic two-light creator setup. | Best back light | $139.07 · View on Amazon Price as of October 5, 2026. #ad How we’re funded |
The order to buy them in
Buy the keyfirst and buy it properly, because it does most of the visible work and because a key light is the one piece here you will still be using in five years. A COB light on a Bowens mount — the Godox SL60W at the value end, the Amaran 100x S if colour accuracy matters — plus a softbox is the setup that scales. Both are the outgoing model in their respective lines now, which is part of why they represent such good value; both are still widely sold.
Buy fill second, and only once you can point at a shadow you want to lift. Until then a sheet of white foam board does the job for almost nothing, and the two-box Neewer kit is a cheap way to own a key and a fill at the same time if you would rather start with both. Buy back lightlast. It is the one with the most visible effect per dollar once the first two are right, and the least point before that — a rim light on a badly lit face is still a badly lit face.
One substitution worth knowing: for seated talking-head video at a desk, the whole three-point arrangement is often overkill. A single soft source in front of you at the right height does it, which is what a desk key light is designed for, and what our Zoom call lighting picks are built around. Three-point lighting earns its name when you are lighting a space on a tripod, not a face at arm’s length.
Frequently asked questions
What is three-point lighting?
A standard arrangement of three lights around a subject. The key light is the main source and sits in front and off to one side, creating the shape of the face. The fill light sits on the opposite side at lower brightness to soften the shadows the key leaves. The back light sits behind the subject and puts a rim of light on their hair and shoulders to separate them from the background.
Where do you put each light in a three-point setup?
Key light: in front of the subject, roughly 45 degrees to one side and a little above eye level, angled down. Fill light: on the opposite side, close to the camera axis, dimmer than the key. Back light: behind the subject and above, pointed at the back of their head and shoulders, out of frame. Then adjust by looking at the face, not by measuring angles.
Do I need three lights for video?
No. One well-placed key light plus a white card or a window as fill will light a talking-head shot properly, and most people get more out of improving that key light than out of adding a second or third. Buy one good light, learn where to put it, then add a fill when you can point at a shadow you actually want to lift.
What is the difference between key and fill light?
The key light is the main light and it creates the shadows. The fill light reduces them. The ratio between the two is what sets the mood: a fill close to the key's brightness gives a flat, bright, commercial look, while a much dimmer fill leaves deep shadow on one side for a moodier, more dramatic image.
What does a back light do?
It separates the subject from the background. Placed behind and above them, pointing at the back of the head and shoulders, it draws a bright rim along their edge so they stop blending into a dark wall. It is also called a hair light or a rim light, and it does not light the face at all.
Can I use a window as one of the three lights?
Yes, and it is the best free light available. A large window is a huge soft source, which makes it an excellent key — sit side-on to it and you have shape immediately. It also works well as fill opposite an artificial key. The one limitation is that it changes brightness and colour through the day, so a shot you match tomorrow will not match.
What is the difference between soft and hard light in a three-point setup?
Soft or hard is about the size of the source relative to the subject, not its brightness. A big softbox close in is soft and wraps around a face gently; a small bare LED is hard and draws sharp-edged shadows. Most people want a soft key for faces, which is why the modifier you put in front of the light matters as much as the light itself.
Sources
- Aputure — Official lighting specifications — Aputure/amaran official spec pages (accessed July 18, 2026)
- Godox — Official lighting specifications — Godox official continuous-light spec pages (accessed July 18, 2026)
- Neewer — Official product specifications — Neewer official lighting and studio spec pages (accessed July 18, 2026)
Keep reading
Best Video Lighting Kits
Complete kits that cover key, fill and back in one purchase.
See lighting kitsBest Softbox Lighting Kits
The cheapest route to two genuinely soft sources.
See softbox kitsLighting Basics for Video
The wider primer: soft vs hard, colour temperature, CRI.
Read the basicsWhat Size Softbox Do I Need?
Sizing the modifier that makes your key light soft.
Read the sizing guide