Drone Photography: Getting Started
What to buy, what the rules actually require, and the settings and habits that separate a usable aerial photo from an expensive snapshot.
Drone photography is mostly ordinary photography done from an unusual place. The aircraft is the part that feels hard and is actually the easy part — modern camera drones hold position by themselves, come home by themselves, and are genuinely difficult to crash in an open field. What takes time is everything that was already true on the ground: reading light, finding a composition, exposing for a sky, and knowing when a view is worth photographing at all.
This guide covers the order to do things in. What to buy first, what the rules require before you take off, what to do on your first flight, and the settings and composition habits that separate an aerial photograph from a picture that only proves you own a drone. If you have not bought anything yet, start with the three picks below — all sub-249 gram, which keeps the paperwork simple in the US.
One honest expectation to set: a drone camera is a small sensor on a stabilized mount. It will not out-resolve your mirrorless body and it does not need to. Its value is the angle, and the angle is worth more than the sensor in almost every frame you will take with it.
How this is funded:we earn a commission if you buy through our links, at no extra cost to you. It never changes which product we recommend, and we’ll tell you plainly when to skip one. Full disclosure.
Quick picks
Ranked on published specs and buyer fit. Select a row to jump to the full write-up. We have not tested these products — here is exactly what we do instead.
| # | Product | Best for | Price |
|---|---|---|---|
| 1 | 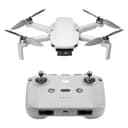 DJI Mini 4K The easiest way into aerial video, and it stays under the 249 g line that keeps registration simple for most hobby fliers in the US. A 3-axis gimbal and stable 4K make it far more capable than the price suggests — the honest entry point before you spend real money on a drone. | Best first drone | $299.00 · View on Amazon Price as of October 27, 2026. #ad How we’re funded |
| 2 | 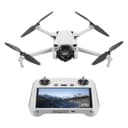 DJI Mini 3 The step up from the Mini 4K: a larger sensor, true vertical shooting for social, and longer battery life, still under 249 g. If you post to Reels or TikTok from the air, the native vertical mode alone can justify the jump. | Best for social video | $549.00 · View on Amazon Price as of October 27, 2026. #ad How we’re funded |
| 3 | 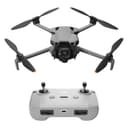 DJI Mini 5 Pro The first sub-249 g drone with a true 1-inch sensor, which is the single biggest jump in aerial image quality you can get without crossing the weight line that triggers US registration. You get 50 MP stills, 4K/60 HDR and omnidirectional obstacle sensing backed by a forward LiDAR that still sees in near-darkness. It costs about as much as a mid-range mirrorless body, and that is the only real catch. | Best image quality under 249 g | $759.00 · View on Amazon Price as of October 27, 2026. #ad How we’re funded |
Why those three
All three stay under 249 grams, and that single number shapes the whole beginner end of this category. In the US, a recreational drone below 250 grams does not have to be registered with the FAA, which removes a step, a fee and a Remote ID requirement from your first flight. Manufacturers design to that line deliberately — it is why the mini class exists and why it is where almost everyone should start.
The DJI Mini 4K is the honest entry point: a 3-axis mechanical gimbal and stable 4K for the least money. Its 1/2.3-inch sensor is the compromise, and it has no obstacle avoidance, so you are the collision-detection system. The DJI Mini 3 adds a larger 1/1.3-inch sensor and a true vertical shooting mode, which is the reason to pick it if your footage ends up on Reels or TikTok rather than YouTube. The DJI Mini 5 Pro is the one that changes what the pictures look like: a 1-inch, 50-megapixel sensor and omnidirectional obstacle sensing, at roughly the price of a mid-range mirrorless body.
If you want the wider field, including the heavier dual-camera aircraft that cross the registration line on purpose, our best drones for photography roundup has the full list. Head-to-head, the two comparisons people ask for most are Mini 4K vs Mini 3 and Mini 3 vs Mini 5 Pro.
Your first flight, in order
Do this in a big empty field, not over water and not in a park full of people. Charge everything the night before, including the controller and your phone. Update the firmware at home on wifi, because a drone that decides to update itself in a field with one bar of signal will eat your flying window.
On site, walk the area first and look up: power lines, trees, nesting birds, and anything metal large enough to upset the compass. Set the aircraft on flat, hard ground away from cars. Wait for a solid GPS lock before you take off — this is what lets the drone hold position and return home, and taking off without it is how beginners lose aircraft. Then hover at head height for thirty seconds and just watch it. You are checking that it holds still, that the gimbal is level, and that the video feed is clean.
Fly a simple square at low altitude before you do anything interesting. Learn which way the sticks move the drone when it is facing you, because the controls invert relative to your point of view and that moment of confusion is responsible for a large share of first-week crashes. Keep the aircraft in sight the whole time, and bring it home at 30 percent battery rather than waiting for a low battery warning.
The rules, briefly
Flying recreationally in the US means passing the free TRUST test online and carrying proof of it, staying at or below 400 feet in uncontrolled airspace, keeping the aircraft within visual line of sight, and not flying over people or moving vehicles. If your drone weighs 250 grams or more you also have to register it and it must broadcast Remote ID. Controlled airspace near an airport needs authorization, which you request through LAANC in an app before you fly.
Those are the federal rules and they are the floor, not the whole picture. States, counties, cities and park authorities add their own restrictions, and national parks in particular prohibit launching and landing entirely. Check the FAA’s own guidance before your first flight and check local rules for anywhere you travel with the drone — a sub-250 gram aircraft does not exempt you from any of this, it only exempts you from registration.
Camera settings that make the difference
Shoot raw. A drone sensor is small, aerial scenes have a bright sky and a dark ground, and raw is what lets you pull both back in editing from a single frame. The JPEG your drone produces has already thrown away the information you need. Raw vs JPEG covers what you are keeping, and dynamic range explained covers why the sky blows out in the first place.
Keep ISO at base. Small sensors fall apart quickly as ISO climbs. Leave it at 100 and let the shutter do the work; you are almost always shooting in daylight, and the aircraft is stabilized enough that slow shutter speeds are rarely the problem. ISO explained has the detail.
Expose for the highlights.Use the histogram, not the screen — a phone in bright sun lies to you about brightness. A sky that clips to pure white cannot be recovered; a foreground that is a stop dark can. Understanding histograms covers reading it at a glance.
Bracket when the light is hard. Most camera drones will shoot an automatic exposure bracket of three or five frames. On a scene with a bright sky and a dark coastline, that is the easiest route to a frame that holds both. HDR photography covers blending them without the result looking artificial.
For video, add an ND filter. A neutral-density filter is a dark piece of glass that lets you keep a 1/50 or 1/60 shutter in daylight, which is what makes motion look natural instead of staccato. It is the cheapest meaningful upgrade to drone footage and most mini drones have a filter set made for them. Camera filters explained covers which strengths to buy.
Composition from the air
Height is not a composition. The most common beginner aerial photo is the one taken at maximum altitude pointing straight out at the horizon, and it almost never works — everything is small, nothing leads the eye, and the picture says “I own a drone” rather than anything about the place.
Three things fix it. Go lower than you think. A lot of the best aerial work happens between 50 and 150 feet, where you are high enough for a new angle and low enough that objects still have scale. Point the camera down.The top-down shot turns a landscape into a flat pattern — fields, harbors, roundabouts, forest canopy, surf hitting a beach — and it is a view nothing else can get you. Find a line. A road, a river, a shoreline, a row of trees: from above, lines become the whole composition, and a curve running from a corner of the frame into the distance will carry a photo on its own.
Light still matters as much as it does on the ground, and arguably more. The hour after sunrise and the hour before sunset throw long shadows that give aerial scenes depth and texture; midday from above is flat, grey and boring. Our landscape photography guide and composition basics both transfer directly to this.
What else to buy, and in what order
Spare batteries first. A single battery gives you roughly 25 to 35 minutes of actual flying, less in cold or wind, and you want to land at 30 percent. Two spares turn a drive to a location into a real session. The Fly More bundles are usually cheaper than buying batteries separately.
Fast memory cards second. 4K video at a high bitrate needs a card rated for sustained writes, and a slow card causes dropped frames and failed recordings. Our SD card roundup covers what the speed-class ratings actually guarantee, and memory cards explained covers the labels.
ND filters third, if you shoot video at all. A case fourth— propellers and gimbals are what break, and both break in bags.
What you do not need on day one: a second controller, a propeller guard set beyond the one in the box, or a subscription to anything. Spend the money on spare batteries and more flights instead.
The mistakes that cost people drones
Flying in wind the aircraft can handle but you cannot. A mini drone holds position impressively in a stiff breeze and then runs its battery down fighting it on the way home. Check the wind at altitude, not at ground level, and fly out into the wind so you come home with it.
Trusting return-to-home blindly. It climbs to a preset altitude and flies a straight line back. If a tree or a building is on that line and the drone has no obstacle sensing, it flies into it. Set the return altitude above everything around you before you take off.
Losing orientation.When the drone faces you, left is right. If you get confused, stop, let go of the sticks, and let it hover — it will hold position while you work out which way it is pointing.
Flying somewhere you are not allowed to. The expensive version of this mistake is not a crash, it is a fine. Check the map in the app and the local rules before you launch, every time, especially when traveling. Our travel photography guide covers getting the gear there in one piece.
Frequently asked questions
Do I need a license to fly a drone for photography?
For recreational flying in the US you do not need a pilot's license, but you do need to pass the free online TRUST test and carry proof of it. If you are paid for the photos — or the flight is part of a business — you need the FAA's Part 107 remote pilot certificate instead, which is a real exam.
Do I have to register a drone under 250 grams?
Not for recreational flying in the US. That is the whole reason the sub-249 gram mini class exists. You still have to pass TRUST and follow every other recreational rule, and a drone of 250 grams or more must be registered and broadcast Remote ID.
What is the best drone for a beginner photographer?
A sub-249 gram mini with a 3-axis mechanical gimbal. The DJI Mini 4K is the cheapest sensible entry, the Mini 3 adds a bigger sensor and vertical shooting, and the Mini 5 Pro adds a 1-inch sensor and obstacle sensing for considerably more money.
How high can I legally fly a drone?
Recreational flyers in the US are limited to 400 feet above ground level in uncontrolled airspace, and need authorization through LAANC to fly in controlled airspace near airports. Local and park rules can be stricter, so check before you launch.
Should I shoot raw or JPEG on a drone?
Raw. Drone sensors are small and aerial scenes almost always contain a bright sky and a dark ground, so you need the extra latitude to balance the two in editing. Shoot raw plus JPEG if you want something to post immediately.
Do I need ND filters for drone photography?
For stills, rarely. For video, yes — an ND filter lets you hold a shutter speed around 1/50 or 1/60 in daylight, which is what keeps motion looking smooth rather than stuttery. A basic three-filter set for your model is an inexpensive upgrade.
How long can a beginner drone fly on one battery?
Roughly 25 to 35 minutes of quoted flight time on the mini class, and less in cold weather or wind. Plan to land at about 30 percent, which makes the practical figure shorter still — which is why spare batteries are the first accessory to buy.
Sources
- DJI — Official product specifications — DJI official spec pages for Osmo, Mic and drones (accessed July 18, 2026)
- FAA — Unmanned Aircraft Systems (drones) — Official US recreational-flyer rules, including registration and the 250 g weight threshold (accessed July 18, 2026)
Keep reading
Best Drones for Photography
The full field, from sub-250g minis to dual-camera aircraft.
See drone picksHow to Photograph Landscapes
Most of what makes a good aerial photo is a landscape skill first.
Read the guideComposition Basics
The framing rules that matter even more from 300 feet up.
Read the basicsRaw vs JPEG
Why your drone's raw files are worth the extra card space.
Read the explainer