The standard one-camera interview setup
Seat your subject at an angle to the camera rather than square-on, and have them look slightly off-lens at you — that is the classic interview framing and it is what the lighting below assumes.
The key light goes on the side the subject is turned toward, roughly 45 degrees around from the camera and raised so it points down at about 30 to 45 degrees. Bring it as close as framing allows: closer is softer. Nothing else you do will improve the shot as much as getting this one light in the right place.
The fillgoes on the opposite side, further back and deliberately weaker — half the brightness of the key is a sensible starting point. Its only job is to stop the shadow side of the face going completely black. If both lights are equally bright you get flat, characterless light; the difference between them is what creates shape. With fixed-output bulbs, you create that difference by moving the fill further away.
Separation is the optional third element: a light behind and to one side of the subject, or simply a lamp already in the room left on in the background. It stops a dark-haired subject merging into a dark wall. The full arrangement is laid out in three-point lighting, explained — worth reading before you buy a third fixture, because most people get more from improving the first two.
Lighting two people
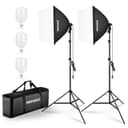
Two chairs changes the problem. The clean solution is not four lights — it is one large key placed between the subjects and slightly to the camera side, so it keys one face and fills the other, plus a second box doing the same job from the other side. Each light is the other person’s fill. That is precisely why two matched 24-inch boxes is the kit to own for interviews rather than one brighter fixture.
Keep the two lights at clearly different distances or heights so the faces do not both end up flatly lit from the front. And check both subjects on camera, not by eye: a box that looks beautiful on the person nearest it is often spilling onto the background behind the other one.
Matching the room you were given
Most interviews are not filmed in studios. You get an office with overhead fluorescents, a window on one wall and a lamp in the corner, and the fastest way to a bad-looking interview is to add a daylight-balanced light to all of that and leave everything on.
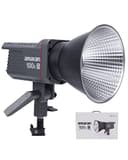
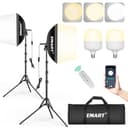
The fix is to decide what your dominant light is and make everything else agree with it. If there is a good window, use it as your key, put your own light on the shadow side as fill, and turn the overheads off. If there is no usable window, turn everything off and light the scene yourself. Where bi-color control earns its money is the in-between case: a room with warm lamps you cannot switch off, where dialing your own light toward 3200K makes the whole frame coherent instead of half-orange. Both the EMART kit (3000-6000K) and the Amaran 100x S (2700-6500K) can do that; fixed-daylight bulbs cannot. There is more on this in white balance, explained.
Location work: what actually goes in the bag
If you are traveling to the interview, weight and setup time become specifications. A two-stand softbox kit is twenty minutes of setup and a car boot full of gear; worth it for a scheduled shoot in a room you have scouted, painful for a fifteen-minute window in a conference room.
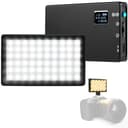
The small-kit answer is one battery panel as a key, bounced off a white wall or through a piece of diffusion if you have room for it, plus the room’s own light as fill. That is what the Lume Cube Bicolor Panel Mini is for — it will not light a room, but with the subject close to it, it lights a face, and it needs no socket. Pair it with the mics in our wireless microphone roundup and the whole interview kit fits in one bag.
Mistakes that show up in the edit
A light so bright you had to move it back. Distance makes light harder as well as dimmer, so a non-dimmable light pushed across the room gives you unflattering shadows. Dimming, or a bigger box, is what you are paying for when you spend more.
The background forgotten. The subject is lit, the wall behind them is dark and flat, and the shot looks like a hostage video. Even a cheap practical lamp in frame fixes it.
Lights visible in glasses, screens or picture frames. Check the frame for reflections before you roll; if your subject wears glasses, raise the key and angle it down further, as described in lighting for glasses wearers.
Nobody weighted the stands. A cheap stand with a big softbox on it will fall over at some point during a two-hour interview. Hang a bag off the center column and tape the cable down.