How many lights do you need?
One, then two. A single light through a softbox, placed slightly above and to one side of the product, with a sheet of white card propped on the opposite side to bounce light back into the shadow, is a complete and professional setup. It is how a very large share of the product images you see online are made. Adding a second light as fill means you can control the shadow precisely rather than accepting what the card gives you, which matters when you are matching a hundred images to each other.
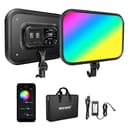
A third light earns its place pointed at the background, not the product. Lighting the backdrop separately is what gives you a clean white seamless background without blowing out the product itself, and it is also where the Neewer RGB panel comes in — a colored wash behind a product is a styling choice you can make in-camera instead of in Photoshop. For the reasoning behind the whole arrangement, read three-point lighting, explained.
Continuous light or flash?
Every pick here is continuous— an LED that stays on. For tabletop product work that is usually the right answer, and the reason is simple: what you see is what you get. You move the light, you watch the highlight travel across the bottle, you stop when it looks right. There is no test-fire-and-review loop, which matters enormously when you are learning.
Flash still wins on raw power and on freezing motion — a splash, a pour, powder in the air. It also lets you shoot at a low ISO with a small aperture for front-to-back sharpness without needing a very bright lamp. If your products sit still on a table, continuous light is easier and cheaper; if you shoot liquids in flight, you want flash. We go through the trade-off properly in flash photography basics.
What to put in front of the light
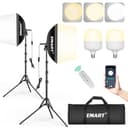
The light is half of it; the modifier is the other half. A softboxis the default — even, controllable, easy to feather off a background. For small items, a modest box placed very close gives you a long soft gradient down the side of the product, which is what makes it read as three-dimensional. A shoot-through umbrella is cheaper and spreads light everywhere, which is convenient and harder to control when you are trying to keep the background clean.
Two cheap additions do a disproportionate amount of work. A sheet of white foam board as a bounce costs almost nothing and replaces a second light. A sheet of black card does the opposite job — held just out of frame, it deepens the shadow side and puts a dark edge on a glossy product, which is how you get shape into white-on-white shots. Reflective products especially are lit by what surrounds them, not by where you point the lamp.
Camera settings and the rest of the setup
Put the camera on a tripod. Product work rewards a small aperture for depth of field and a low ISO for clean detail, and both of those push the shutter speed down past hand-holdable — a tripod makes that a non-issue and, more importantly, keeps the framing identical across a whole set of products. Our tripod roundup covers the options, and how to photograph products walks through the shoot itself.
Set a custom white balance from a white card under your lights and leave it there for the whole session. Shoot raw. And turn off every other light in the room — the warm ceiling bulb and the window are both adding their own color to your carefully neutral setup, and mixed color temperature is the single most common reason home product shots look slightly wrong in a way that is hard to fix afterwards.