Kit or COB-plus-modifier?
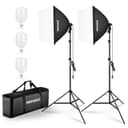
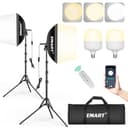
A kitis one purchase that arrives complete: boxes, stands, bulbs, bag. Nothing to research, nothing missing, and the price is low because the parts are basic. The compromise is control — the bulbs in the two budget kits here are fixed-output, so your dimmer is the distance between the light and your subject, and the stands are light enough that you will want to weight the legs.
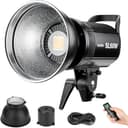
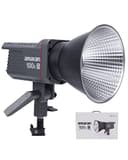
A COB light plus a modifier is the other route. The Godox SL60W and the Amaran 100x S are single bright LEDs on a Bowens mount — the standard fitting the whole modifier industry uses — so you bolt on whatever softbox, umbrella or dome you want and swap it later without buying a new light. They dim properly, they hold their color as they dim, and the Amaran is rated CRI 95+, which matters for skin tones. You pay more and you buy a stand and softbox separately, but nothing in the setup is disposable.
Two honest notes on those two. The original SL-60W has been superseded by Godox’s SL60II generation, and the Amaran 100x S no longer appears in amaran’s own COB lineup now that the Halo series has arrived. Both are still widely sold and still excellent value, but you are buying the outgoing model in each case. If that bothers you, buy a kit.
What size softbox do you actually need?
Bigger is softer, and the comparison that matters is box size against subject size. For a head-and-shoulders talking-head shot, a 24-inch box placed a few feet away is already a large source relative to a face, and that is why the 24-inch Neewer kit is the default recommendation. A 16-inch box like the EMART’s is still noticeably softer than a bare bulb, and it suits a desk or a small spare room where a big box would be in your way — but you need to put it closer to keep the light soft.
For a half-body or full-body portrait, or two people on a sofa, you want more surface: a larger box, or two boxes feathered together. Tabletop product work is the easy case — your subject is small, so even a modest box is enormous relative to a watch or a bottle, and a 16-inch softbox close in will do beautiful work. We walk through the sizing in more detail in what size softbox do I need.
How to set two of them up
Put one box in front of your subject and off to one side — roughly 45 degrees around and a little above eye level, angled down. That is your key, and it does most of the work. Put the second box on the opposite side, further back or further away so it is dimmer, to lift the shadows the key leaves behind. If both lights are the same brightness at the same distance you get flat, shadowless, slightly characterless light; the difference between them is what creates shape. With fixed-output bulbs, you create that difference with distance.
Once you have those two working, a third light pointed at the background separates your subject from the wall. That is the classic arrangement, and it is explained properly in three-point lighting, explained — worth reading before you buy a third light, because most people get more out of improving the first two.
Mistakes worth skipping
The common one is buying the biggest kit available for a small room. Two big boxes on stands in a ten-foot bedroom cannot be positioned properly and will spend their lives in a cupboard. Buy for the space you have. The second is mixing color temperatures: a daylight softbox plus the warm ceiling bulb plus a window is three different colors on one face, and no amount of white-balance correction untangles it. Turn the room lights off, close the blind, and let your lights be the only light.
The third is assuming a softbox replaces a key light for a webcam. For a seated call, a desk panel is easier, tidier and better suited to the job — see the best key lights for Zoom calls instead. Softbox kits come into their own the moment the camera is on a tripod and you are lighting a space rather than a face at arm’s length.